Connecting the Genie Nano 10G Camera
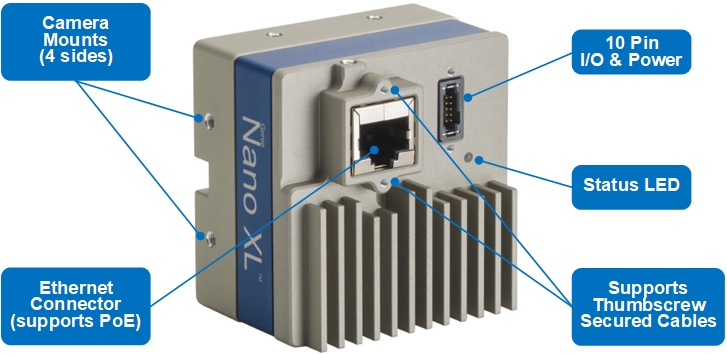
To connect the camera
-
Connect the camera to the host computer's dedicated GigE network adapter, either directly or through an Ethernet switch, using the Cat6 cable.
-
If using an external power supply, plug in the IO & Power cable.
-
Check the Status LED Indicator, which will be initially red then switch to flashing blue while waiting for IP configuration.
Once communication with the host computer is established, the automatic IP configuration sequence will assign an LLA IP address as described in section IP Configuration Sequence, or a DHCP IP address if a DHCP server is present on your network (such as the one installed with Sapera LT). The factory default for this device is Persistent IP disabled and DHCP enabled with LLA always enabled as per the GigE Vision specification.
 ©
©